Monday, March 17, 2014

Simplistically Divine Quiche


Quiche has always been a longtime favorite for me, since childhood. This is my very own recipe that I have made too many times to count and every time it has come out just as good, if not better, than the last time! It's ingredients are simple, and not overly complicated. Spinach, Swiss, Gruyere and bacon are the highlights. Now to share it with you! 


Total Time: 1 hour and 15 mins
Prep: 15 min
Cook: 45 mins to 1 hour
Yield: 8 servings
Level: Easy

Ingredients
6 large eggs, beaten
1 1/2 cups heavy cream
Salt and pepper
2 tsp of Herbs de Province
1 1/2 tsp of garlic powder
1 tsp of parsley
2 cups chopped fresh baby spinach, packed
1 pound bacon, cooked and crumbled
1 cup shredded Gruyere Cheese
1/2 cups of premium Swiss cheese
1 (9-inch) refrigerated pie crust, fitted to a 9-inch glass pie plate. (Feel free to grab a pre-made one from the grocery store or make your very own from scratch! I recommend using the basic pie crust recipe from the Joy of Cooking cookbook!)

Directions
Preheat the oven to 375 degrees F. Combine the eggs, cream, salt, pepper, herbs de province, garlic and parsley in a food processor or blender, till smooth. Layer the spinach, bacon, and cheese in the bottom of the pie crust, then pour the egg mixture on top. Bake for 45 minutes to an hour until the egg mixture is set. Feel free to layer a bit more grated cheese on top 10 mins before taking it out of the oven. Let cool about 10-15 mins before cutting. Cut into 8 wedges. 


**Serve alongside a mixed greens salad with a french vinaigrette dressing.

Saturday, March 1, 2014

My Stella & Dot Trunk Show!

One of my very good girlfriends just started selling this insanely hot jewelry line and once I saw a few pieces of the jewelry for myself in person, I knew I couldn't resist having a party of my very own! Stella & Dot's Jewelry is readily found in high fashion magazines and worn by trendy celebs everywhere! (And it's for good reason!) Their gems and jewelry are super high quality and are designed by some of the best well known and respected jewelry designers!

I've never hosted a trunk show of any kind before, so I really didn't know what all to expect. After hosting my own however, I would highly recommend having one of your own, if you have yet to do so!


Here's a summary as to how mine played out!

I sent out the the invites through email, about a month in advance. I invited about 50 guests and about 30 RSVPed! Which is a great turn out! The Evites were sent out through the Stella and Dot website and were super adorable! 

When my Stella and Dot Reps arrived about an hour early to set up, they did an amazing job on the layout of all the jewelry and accessories! All I supplied, was my black table cloth, black and white canopy runner, and the floral arrangements. They did all the hard work and it turned out magical! Once they were done setting up, my dining room had immediately been transformed into a high fashion Trunk Show, complete with all the shimmer and sparkle I could have hoped for! Almost like being a celeb for an evening, they brought all the accessories and pieces to me, right to my home! 


My party was set to start at 6:30 pm, so I wanted to offer simple yet hardy appetizers. Some of our selections included spicy deviled eggs, fresh veggies with dip and hummus, two cheese assortments, caprese & pesto tortellini bamboo skewers, and goat cheese stuffed peppers! (The peppers were currently in the oven when I snapped this one below!)


Sweets included homemade Vanilla on Vanilla Layer Cake and chocolate cupcakes frosted with strawberry buttercream! (Strawberry buttercream recipe on blog.) I color coordinated the cake with Stella & Dot's signature aqua color just for fun! 


Our Signature Cocktail for the evening was a Sarasota Spritzer! I found the Recipe on Pinterest! It contained 2 bottles of Riesling wine (I used dry Riesling), about a cup of 7up, a frozen raspberry lemonade concentrate and a carton of muddled strawberries! It was not only delicious but also bright and festive! We also served wine and champagne, and fresh lemonade!


All of Stella & Dot's packaging is insanely adorable for each and every piece of jewelry! Complete with a dapper compliment in every box! :)


This was a quick snapshot of me, minutes before my first guest arrived... My Rep let me choose a piece of jewelry to wear for the evening and my heart instantly fell in love with this bib necklace! I, of course, plan on ordering it without a doubt! 


I have to warn you...The hardest part about hosting your own Stella and Dot party is, not falling in love with EVERYTHING on display!!! So much of the jewelry looks a million times more glamorous in person, than it does on the website! Trying on and layering all the different accessories, along with some cocktails and your best girlfriends, is a fabulous way to spend a sassy girls night in! Thank you Stella & Dot, all my best girls, and most especially my reps, who made my night, a perfect night to remember! XOXO

Monday, February 17, 2014

Chocolate Delight Pie

Delightful, dreamy, and indulgent...This pie has it all! It happens to be my husband's all time favorite dessert and for good reason! This recipe has been passed down throughout the generations of our family and now I'd like to share it with you all! This pie recipe has many names. "Better then Sex Pie" is a popular one, but our family has always stuck to "Chocolate Delight Pie"...Call it what you like, but there are few things that really are better! 

You can definitely substitute a large portion of the ingredients for a "quickie" version, for instance, instead of making homemade chocolate pudding from scratch, you can substitute it for Jello chocolate pudding instead. The same goes for the whipped cream. However, if you have the time, trust me, it's worth it to make each step from scratch! It's a blast to make with your family! You make the crust, while they make the other layers and in a few hours you have a pie made with love, laughter and "delight"...What really could be better???

Layer 1. Crust   Layer 2. Chocolate Pudding
Layer 3. Vanilla-Almond Cream-Cheese     Layer 4. Whipped Cream


For the Crust:         
1 ½ cup flour
1 ½ cup pecan pieces, small
1 ½ sticks of melted butter

Preheat oven to 350 degrees. Combine in bowl and stir until moist. Pat down in deep dish pie pan. 20-25 mins or until golden brown.


Layer 1

12oz cream cheese
1 ½ cup whipped cream
1 ½ cup powdered sugar
1 ½ tsp almond extract (if you don’t want this then just substitute with more vanilla)
1 ½ tsp vanilla extract (or more)

Mix cream cheese with sugar. Then add whipped cream, vanilla, and extracts.


Layer 2

¾ cup premium cocoa powder
1/2 cup flour
1 cup sugar
3/8 tsp salt
4.5 egg yolks
1 ½ tsp vanilla (or more)
1 ½ cup of half and half
1 ½ cup of whole milk

Scald milk over medium heat in double boiler for about 10 mins, or until skin has formed over the top. Combine Cocoa w/ sugar, flour and salt. Then add to scalded milk in double boiler. Continue to whisk for 10 mins. Add a tsp at a time, of milk mixture, to egg yolks, stirring after each addition, until you added about 7 spoonfuls. Then add all the egg mixture to custard, slowly mixing. Cook 2 more mins until thick. Take off heat and cool a few mins. Add vanilla.


Whipped Cream Recipe: (3rd layer of pie)

6 cups of heavy cream
3 tablespoons powdered sugar or more if you want sweeter
2 tablespoons vanilla (or more)

Chill bowl, mixer whisk, and heavy cream in freezer for 10 mins prior to making. Combine all ingredients in mixer. Whip to soft peaks .

Layer pie, and then add either pecans, or chocolate shavings to top of pie. Refrigerate for an hour or two prior to serving.


Sunday, February 16, 2014

Amore Affogato!

One of my most beloved desserts of all time, is the delicious affogato! Originated in beloved Italy, this dessert consists of two ingredients, which are espresso and gelato. The term affogato literally means "drowned" in Italian. Quality authentic gelato is heaven on it's own, but hands down even better when "drowned" in Italian espresso! Affogato's are just another thing that make me fall in love with the culture of Italy all over again, as if there aren't already a million reasons already! Here is how to create your very own beloved affogato! Ciao Bella! XOXO


Makes 1 Affogato

Ingredients:

Either Vanilla, Chocolate, Caramel, or Hazelnut flavored Gelato 
(I'm a fan of Talenti, but any premium brand will work!)
1 shot of Italian Espresso (I use Illy)
Whipped Cream (Optional)
Either chocolate covered espresso beans, or chocolate shavings (for the garnish)


Instructions:

Take the gelato out of the freezer for about 3-5 mins for it to soften. Prepare the espresso. Scoop about 2-3 medium sized scoops into a coffee cup, or small glass. Take the espresso and pour the entire shot over the scoops of gelato. Take your whipped cream, and layer on top. Garnish with chocolate coffee beans, or chocolate shavings. Serve immediately with a spoon and enjoy!


Thursday, February 13, 2014

Chocolate Covered Strawberries!

Good Evening Everyone! I felt a little romantic at heart today, due to the light snow flurries falling off and on, all throughout the day, so I thought what could be more romantic than Chocolate covered Strawberries "flurried" with some shredded coconut? Here is how to create and design your own:


Ingredients:

1 Pound (about 20) of Large Ripe Strawberries (Strawberry is peak season around April through June but most large supermarkets carry them year round)

6 Ounces of bittersweet 60% or higher, quality dark chocolate.

1/2 cup of shredded Coconut 


Directions: 

Wash and dry the strawberries. Cut off the leaves and stems. Line a sheet pan with parchment or wax paper. Set aside. Put the chocolate into a heatproof medium sized bowl. Fill a medium saucepan with a couple inches of water and bring to a simmer over medium heat. Turn off the heat; set the bowl of chocolate over the water to melt. Stir until smooth. (Or you can heat the chocolate in the microwave at half power for 1 minute, stir, then heat for another minute or until melted completely.)

Once the chocolate is melted and smooth, remove from heat. Drop one strawberry at a time into the melted chocolate and roll bowl gently to coat strawberry completely. Remove delicately with a fork, while allowing excess chocolate to drip off. Place each strawberry on wax or parchment paper. Repeat until all strawberries are covered in chocolate. Then take a spoon and sprinkle some coconut over each strawberry while chocolate is still wet and soft, so the coconut will stick. You can also add some chocolate drizzle over the coconut, just for looks, by dipping a fork in the left over chocolate and let the drizzle drip off the fork in side to side motions across the coconut. (White chocolate is also a nice drizzle touch, if you have some.) 

Set the strawberries aside until the chocolate sets, about 30 minutes. Then enjoy, or wrap up in a gift box as a gift for the one you adore! XOXO


Wednesday, February 12, 2014

Sensational Strawberry Buttercream

If you're looking for a fluffy, smooth, not-too-sweet strawberry buttercream, then look no further! I used to own a cupcake business a few years ago, and feel compelled to share my very own strawberry buttercream recipe with all that are in search of a delightful one. Pair this buttercream recipe with your favorite vanilla, strawberry, or chocolate cupcake recipe. You can't go wrong! I have to say this frosting is perfection on a cupcake, a cookie, or even alone on a spatula! One lick...and you'll think you're in heaven! 

Chocolate Cupcake with Strawberry Buttercream


Recipe Makes about 2 cups
(You can double the recipe for a double batch of cupcakes)


Ingredients:

3 large egg whites, at room temp
3/4 cup of sugar
A pinch of salt
2 sticks of room temperature butter, 
cut up into 16 slices
1/3 cup strained strawberry preserves
3-4 drops of Uniquely Duff Hot Pink Color Gel ($7.99)

Click here to buy Uniquely Duff Electric Color Gels


Directions:

In a heat proof bowl, combine the egg whites and the sugar. Set the bowl over, but NOT touching, simmering water in a saucepan and heat the mixture while whisking constantly, until the sugar has melted completely, about 3 mins. Remove the bowl from the double boiler. Using an electric mixer on high speed, beat the egg white mixture until it is fluffy, smooth, and holds stiff peaks, about 5 mins. 

With the mixer on medium low speed, add a pinch of salt and the butter, two pieces at a time. Beating well after each addition. If it isn't fluffy, or if it turns gritty, continue to beat on high speed until it is nice and smooth, maybe 2-3 mins more. Slowly mix in the strawberry preserves until fully combined. Then add the food coloring and mix until there are no more streaks and color is uniform. Select frosting tip of your choice, (I prefer a large star tip) and then fill pastry bag with buttercream, or simply use a spatula to frost your cooled cupcakes. Garnish with a fresh strawberry!


Strawberry on Strawberry Cupcakes


Monday, February 3, 2014

Cookie & Cocktail Soirée


A new, but delightful idea captured my attention during an afternoon of pinning on Pinterest!  "A Cookie Exchange Party"! After looking at tons of pins and images on google, I quickly realized that most Cookie Exchange Parties, were held during or right after the Holidays and most of them were more cozy, casual gatherings. So I decided it would be only fair to put a new spin on this party! Complete with glam, glitz and all! I took the traditional "Cookie Swap" idea and upgraded it to a "Cookie & Cocktail Soiree!" 


I sent my invites about 3-4 weeks in advance. I used a company called Celebrations. You can always use Evite, which is a free service, but I really prefer Celebrations due to the selection, efficiency, ability to schedule updates and reminders for your event, and it also include a personalized thank you email to all your guests who attend, the day following your event. Here was my finalized emailed invite:


Next, I choose my colors for my event. I decided on gold, black & white with small touches of hot pink and tiffany blue for variety. Since both men and woman were on the guest lists, I wanted the colors to be celebratory and festive, yet not too overwhelming.


I designed the flower display on my own, flowers all from Michael's Arts & Crafts. ($50)  I went with a solid black table cloth (Amazon for $20), and topped it with a black and white striped runner, that I bought from Etsy ($17). Most of the chargers and plates, ranged from solid gold to white porcelain. Gold napkins and plates we purchased from Michael's as well. ($4) We used gold star shaped confetti (Party City for $.69), which gave the table it's needed "Shimmer & Sparkle"! 


We had each guest upon arrival, take a label and write the name of the cookie they brought. The labels were placed right in front of each cookie platter. 


We served an array of appetizers, which I thought was a good idea, with all the sugar we were going to be indulging in! We had everything from goat cheese stuffed peppers, Caprese Salad bites, and Boursin cheese stuffed mushrooms! 


I hung 2 white chinese lanterns (Z Gallerie $10 each) from our overhead lighting over our Island, which turned the whole atmosphere very chic and romantic.


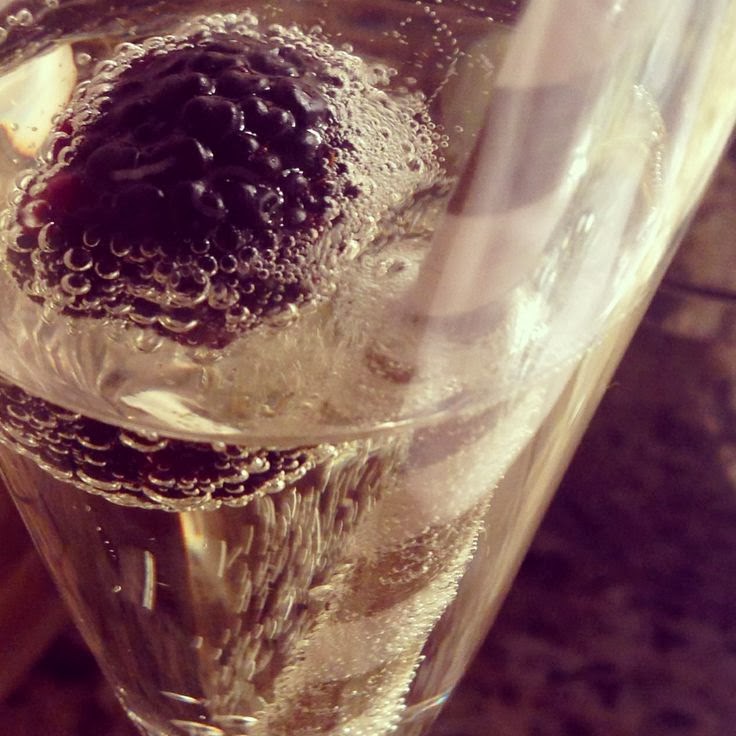
Another main focus of our Soiree, was our cocktail bar! We served Freixenet Sparkling wine (bottles and labels are black and gold, perfect with our theme!), along with St.Germain's Liquor (GORGEOUS BOTTLE), and Chambord. The gold and white striped straws (brought from Amazon $6 for pack of 25) in the champagne flutes (Crate and Barrel, $12 ea.) were super fun and flirty! The Blackberries were a great garnish for the sparkling wine! I had an old mirror, which wasn't being used, and spray painted the frame metallic gold and used it as a tray for our cocktails and sparking wine. Looked like a million bucks, and didn't cost me anything but $6.00 for the spray paint.


  We also served Oatmeal Cookie shots! 
    These went over extremely well with our guests!!


For the left over cookies, we had gold Chinese to go boxes for our guests, 
so they could take their favorites home. They also made adorable favors!
(Papermart.com set of 24, $17 shipping included).


Every single person's cookies were incredible! Cookies ranged from 
delightful Ricotta Orange Zest Cookies, to sweet Mexican Wedding Cookies, 
and fresh Toffee-Chocolate dipped Kahlua Biscotti! 


Almost everyone's most favorite touch of the party?..... 


These adorable small milk bottles with black and white striped straws!
 I bought them on Amazon from Dress my Cupcake Company.
($25.00 for 25 bottles and lids, straws, and free shipping).


After the event, I have to say, I not only enjoyed every moment of the actual Soiree itself, but I also enjoyed every moment of planning it! Everyone raved about it being very fun and unique. I have to say even though this was my very first Cookie Soiree, it definitely won't be my last!